Camera Form Menu of The Laser Profiling Software
| File | ||
|
Save Shot
|
Save current shot into internal 12- 14- 16- 32-bits format file | |
|
Read Shot
|
Read shot 12...14 or 16 - bits, in principle bit rate is not limited | |
|
Save as bmp
|
Save as 256 gray scale Windows bitmap or High bit TIFF format.. | |
|
Make Model
|
Make some model beam (use this to learn program features) | |
|
Recent files
|
||
| Shot | ||
|
12/14 bits
|
make 12/14/16/32-bits full CCD camera shot | |
|
8 bits
|
make 8-bit full CCD camera shot FAST (disabled in some versions) | |
|
init CCD
|
initialize camera for operation (extra feature, not required, automatic initialization occur if not pressed) | |
|
Shot to 3D
|
pass image to main processing form | |
|
info Header
|
read info in header file (conditions of shot) | |
|
Add comment
|
add comment to info header of the shot | |
| Live | ||
|
Live Run
|
Start live camera operation. See note on live Range of intertest (ROI)* | |
|
Live Stop
|
Stop live camera operation | |
|
3D live
|
Start live mode with 3D live visualization mode | |
| Options | ||
|
CCD parameters
|
Adjust camera parameters with correspondent form :more> | |
|
Auto Set
|
disabled | |
|
Calibr CMOS
|
Calibrate Sensor on power. Note:: Laser of known output power required :more> | |
| ROI | ||
|
Full ROI
|
Set whole Frame image read out | |
|
Mark ROI
|
Set some area to be read from camera in live mode and passed to processing. | |
|
Save ROI
|
Save position and size of the ROI for future use | |
*NOTE: ROI mode.
Use mark ROI to set program into
ROI operation. In this mode Live screen and 3D live will operate for selected
ROI area. Full shot will be still made for the whole image. Pressing shot
to 3D "shot> 3D" button will pass ROI to main form for 3D/2D processing
and visualization.
Use the ROI mode to work with small beam
spots. This will considerably save PC resources and speed up the operation.
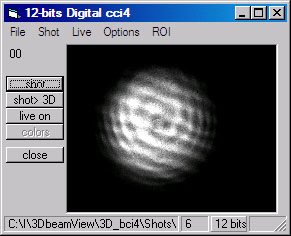
Camera Form Buttons
Buttons on left side
3D
Laser Beam Profiler Help
Advanced 3D Graphics